If you look after your trusty Breville espresso machine, it will reward you with delicious cups of coffee long into the future.
However, it is easy to ignore areas of basic maintenance such as descaling and flushing, all of which will increase the longevity of the machine.
Indeed, if you undertake just a few simple, regular cleaning operations after every use, your Breville espresso machine will stay in pristine condition.
This cleaning guide will explain the most effective maintenance instructions for your Breville espresso machine to ensure it keeps producing beautiful coffee and works well for years to come.
Why Does The Breville Espresso Machine Need Descaling?
Descaling is an overlooked maintenance method, but it shouldn’t be, as it will undoubtedly prolong your espresso machine’s life.
Regular use leads to a mineral build-up in the coffee machine. So, things like chalk and limestone become attached to the interior functioning components. If you don’t address the problem, over time, your machine’s performance will suffer.
Some of the issues these build-ups cause include inefficient heating of the boiler, which leads to variations in the brewing temperature. This, in turn, can affect the all-important flavor of the coffee. Not only that, but the scale can break away and start to impact other areas of the machine or clog up pipes within it. If this happens, don’t be surprised if a hefty repair bill is soon heading your way.
The good news is that a little descaling from time to time can stop those issues before they start, ensuring gorgeous coffee time and again.
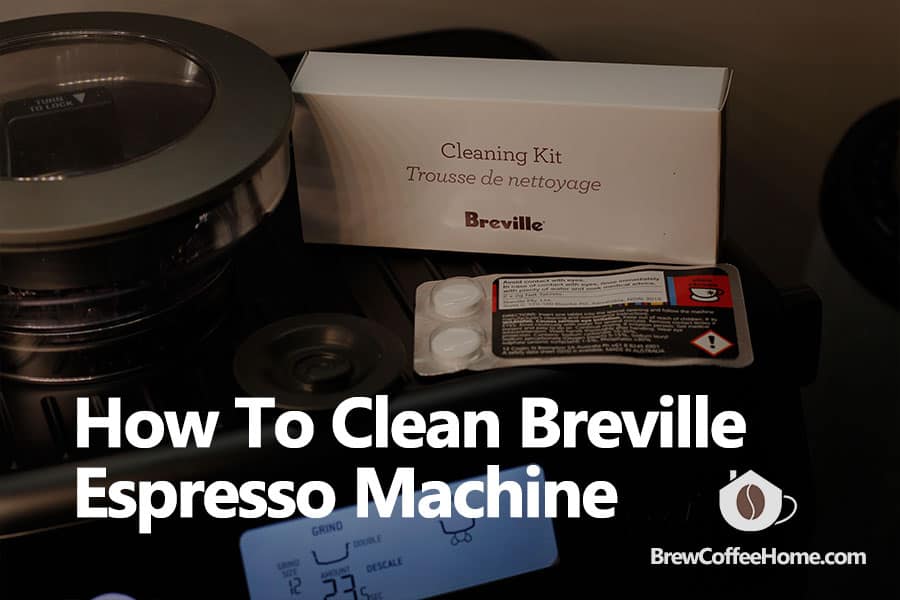
Choosing The Correct Cleaning Solution
Some Breville espresso machines have a cleaning tool kit that contains some cleaning tablets called BEC 250.
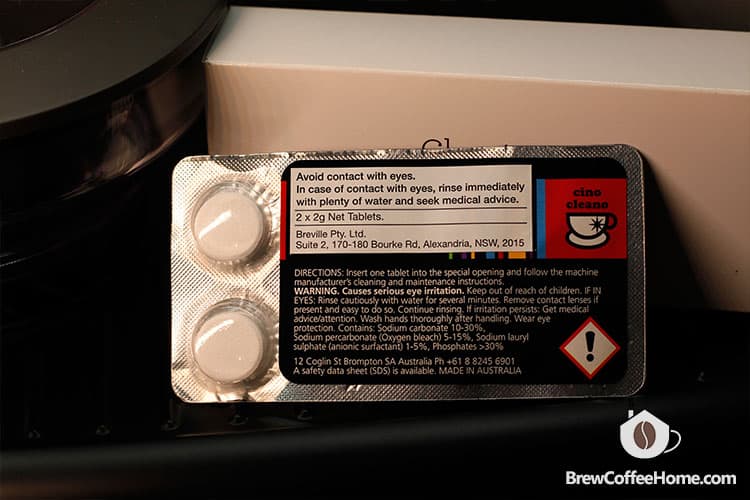
The tablets aren’t essential, which will come as a relief as they are fairly expensive. Alternatively, there are many third-party espresso machine cleaning tablets that will be fine. There is a range of descaling products, including powders, and tablets. If you’d rather avoid the hassle and guesswork, buy the tablets. However, if you’re happy to calculate ratios, the powders are more cost-effective.
Please keep in mind this is for cleaning, not descaling. You can backflush your Breville machine using this, but you’ll need descaling products to descale your machine.
Descaling Solution Or Vinegar?
For many years, the assumption was that white wine and vinegar were the best ingredients for descaling. However, there are issues with vinegar.
Vinegar is an acetic acid, which corrodes rubber seals and certain metals.
Another significant problem is the taste and smell. Boilers can easily absorb flavors and odors, and they can be hard to remove once that happens.
The issues don’t stop there, either. Vinegar doesn’t contain surfactants, which help remove coffee residues, and if these aren’t removed, the flavor can be adversely affected.
However, descalers nowadays are all acids but manufactured from food-grade materials, so there are no safety concerns. Also, they usually contain surfactants, so oily residues shouldn’t be a problem. There are many great descaling products to choose from, such as Durgol Special Decalcifier, Delonghi EcoDecalk, Urnex Dezal.
How To Descale Your Breville Espresso Machine
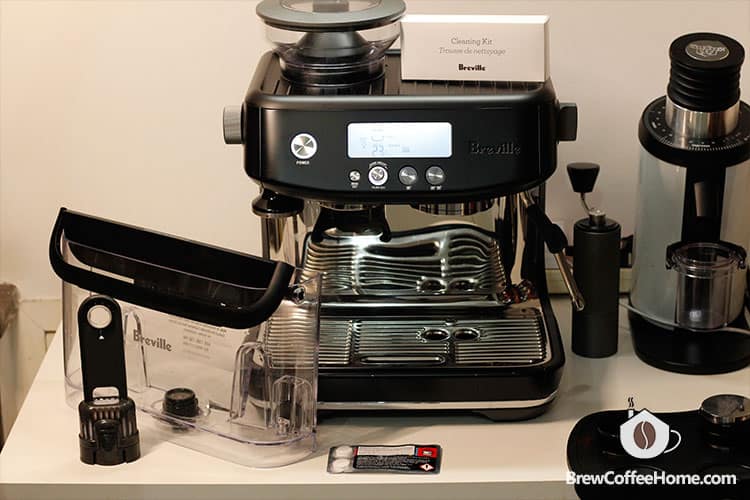
Breville has a range of coffee machines, including Breville espresso machines and drip coffee makers. Many of these products have a cleaning kit containing a brush, tablets, and cleaning disc.
This section will use the Breville Barista Pro BES878 to take you step by step through descaling Breville machines.
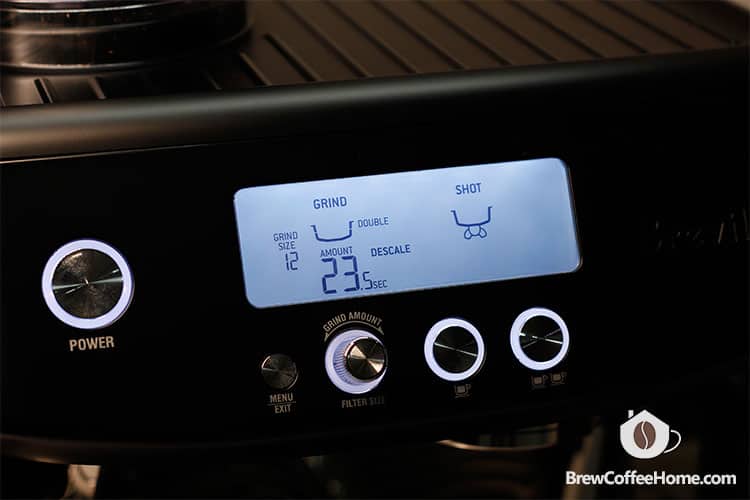
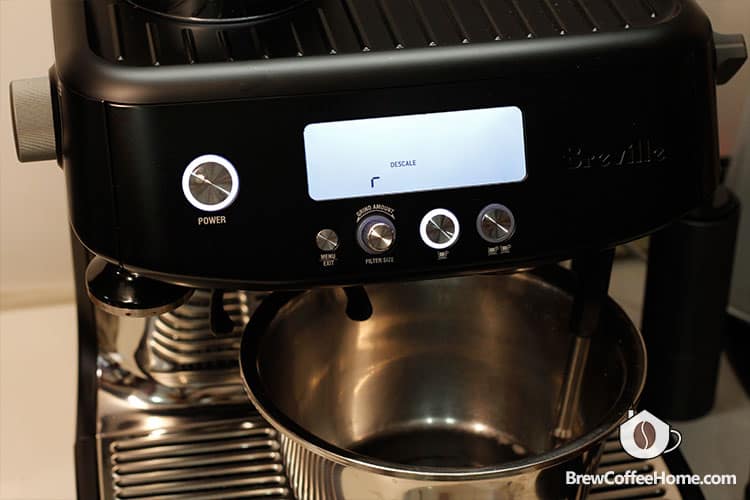
When the LCD screen displays the DESCALE notification, it’s time to initiate the descaling cycle. Then you can begin the cleaning process with the following steps.
1. Prepare the equipment
Remove the water filter from the tank, then add a cleaning tablet to it. Also, ensure the drip tray is empty and place a larger container beneath the brew head to hold the descaling fluid.
2. Add water and descaling agent
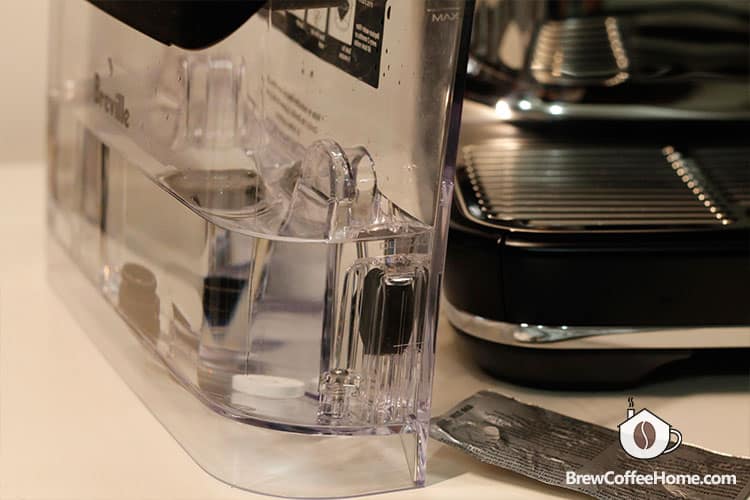
Fill the water tank until it reaches the DESCALE line. Then add the descaling agent, if you use the descaling powder, allow time for the powder to dissolve completely.
3. Enter DESCALE mode

Enter the main menu by tapping the Menu button. Using the GRIND AMOUNT dial, navigate to the DESCALE option, then tap select. When the 1 CUP button lights up, press it to begin the descaling cycle.
4. Finish the three-stage descale cycle
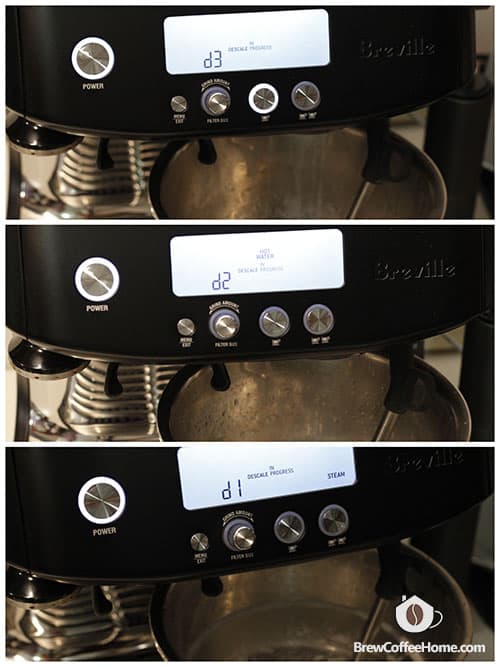
The descale cycle has three stages – coffee, hot water, steam. After the completion of each step, there will be a beep. During the hot water and steam stages, the steam dial on the right will need turning to either the hot water or steam position. Just follow the on-screen instructions to determine where it needs positioning.
5. Begin the rinse cycle
Once the descale cycle is complete, the 1 CUP button will illuminate to indicate the rinse cycle can commence. Empty the water tank and pour fresh water in until it reaches the Max line.
6. Finish the three-stage rinse cycle
Push the 1 CUP button to commence the rinse cycle, then follow the instructions for the descale cycle, as outlined above.
7. Descaling is complete
When the rinse cycle is complete, the machine will go back to the default ready status.
How To Descale Other Breville Espresso Machines
Cleaning And Descaling Breville Single-Boiler Machines
The descaling process is similar for all the Breville single-boiler espresso machines. However, each model may differ slightly in how it notifies you that a descaling cycle or flushing is needed. They may also have different ways of commencing descale mode. Overall, though, they are variations of the same theme. As ever, if in doubt, consult the manual.
Breville Barista Express Machine And Infuser: When it’s time for flushing, the CLEAN ME or CLEAN/DESCALE light flashing. However, when it’s time to descale, the clean me light will stay on (i.e., not flash).
To access cleaning mode, press and hold the Power, 1 CUP, and 2 CUP buttons simultaneously. For descale mode, press and hold the Power button and 2 CUP button. Here’s a video tutorial:
Breville Bambino Plus: If the 1 CUP and 2 CUP buttons flash alternatively, it’s a sign you need to clean the group head. Press and hold those two buttons for five seconds until the machine enters cleaning mode.
When the 1 CUP, 2 CUP, and STEAM buttons begin flashing, it’s time to descale the machine. Push and hold down both the 1 CUP and STEAM buttons at the same time for five seconds, and the machine will go into descaling mode. Check out this informative tutorial:
Breville Barista Touch: This is a little simpler to decipher as the touch screen will display a message when it’s time to clean or descale the machine. From there, you just need to follow the on-screen instructions to complete the descaling process.
How To Clean And Descale The Breville Dual Boiler Machines
Cleaning and Descaling dual-boiler Breville espresso machines (for example, the Breville Oracle) take longer and require more steps.
First, you’ll have to unscrew the drain valves with a screwdriver to drain the boilers. Meanwhile, descaling requires both a descaling and rinse cycle, with each taking around 20 minutes.
This official video from Breville clearly demonstrates how to clean a Breville dual boilers machine.
How Do I Know When Rinsing Of The Machine Is Complete?
Here’s a clever way to tell if the machine is properly rinsed. Take the rinse water and add a small amount of baking soda. If it fizzes, there is still some acid in the water. This isn’t an issue if you use food-grade descaling products as they are harmless. However, for peace of mind, you can run several rinse cycles.
How Often Do I Need To Descale Breville Espresso Machine?
If you live in an area where your water is hard, you will need to descale more regularly than people who live in areas with soft water. For this reason, we recommend that you use a water filter if your machine is compatible. Most Breville espresso machines have a filter holder in the water tank. Using a filter will lead to a better flavor of coffee and mean you don’t need to descale as often.
The bottom line is that the hard water you pour into your espresso machine causes the scales, and tap water usually has a higher mineral content than filtered water. Some machines have test strips for determining water hardness. These will tell you when it’s time to descale your machine.
Backflush Your Breville Coffee Machine
If you’re using a Breville Barista Pro and see the Flush notification on the screen, or the ‘Clean me’ light of your Breville Barista Express is flashing, you’ll need to backflush it.
Backflushing is a process of removing excess coffee residue and used coffee grounds caught behind the brewhead, the inside of the rubber seal, the shower screen, and the three-way solenoid valve. The backflush pipe carries the water into the drip tray directly.
If your Breville machine has a cleaning kit, there’ll be a cleaning disk in the box. If not, you’ll require a blind metal filter basket (i.e., no holes) that stops the water flow from the portafilter’s spouts.

There are only a few steps to backflushing your Breville coffee machine. So, let’s go over them:
- Place the cleaning disc in the filter basket or replace the regular filter basket with the blind basket.
- Place either a cleaning tablet or powder into the basket.
- Attach the portafilter to the brew group.
- Press the Menu button, select Flush.
- Tap the 1 CUP button to begin the cleaning cycle. The remaining time will appear on the LCD screen.
- When the backflush is complete, the machine will beep. Repeat the backflushing process a few more times for a more thorough clean.
- Rinse the portafilter and pull some blank shots with water to remove any residue in the brew group.
You’ll see how dirty water is in the drip tray after flushing.

A cafe barista will backflush the espresso machine at the end of each day. However, for domestic baristas pulling a few shots each day, backflushing a couple of times a week will suffice.
Daily After Use Cleaning Advice
Apart from the importance of backflushing and descaling, there are several other straightforward and effective ways to remove the accumulation of old coffee grounds and oils. Let’s examine the best:
Firstly, between pulling each espresso shot, get into the habit of flushing the group head with some water from the boiler. Doing this will get rid of grounds caught on the filter screen. This will ensure that each shot you brew uses fresh coffee grounds and not old, stale ones.
Secondly, always wipe your filter basket between espresso shots, and clear the top edge of the filter basket. Coffee grounds that are not removed from the top edge of the filter basket will eventually push against the group head’s rubber seal, causing it to deteriorate far earlier than necessary.
Thirdly, remove any excess milk from the steam wand every time you use it to steam milk. Any milk that’s not removed will harden over time, making it more tricky to remove. However, a simple wipe down using a damp cloth after each use will stop it from building up in the first place.
If your Breville espresso machine comes with a grinder, don’t forget to clean the bean hopper and the burr set regularly, so it can grind coffee beans more efficiently. Also, remember to clean the coffee grind bin and empty the drip tray after daily use. I made a video to walk you through the process of cleaning the built-in grinder of Barista Pro.
Each of these simple maintenance methods may not seem particularly important. However, combined, they play a significant role in the overall flavor of the coffee, so they are quick and easy habits worth doing. After all, why invest in an espresso machine capable of delivering gorgeous coffee if you compromise the flavor by failing to perform simple maintenance rituals?
Final Thoughts
As with most pieces of machinery, maintaining your coffee maker properly and regularly is crucial to keeping it working as good as new. Not only that but regular maintenance – either via slightly more complex means such as descaling or through a simple wipe of the steam wand after each use – will help ensure that each coffee your machine produces is as satisfying as the previous one.
However, because deterioration tends to happen incrementally, it can be easy to put off various simple maintenance techniques until some yet-to-be-determined date in the future. Still, By getting into the habit of cleaning and descaling your Breville espresso machine regularly, you will enjoy the fantastic coffees the products are renowned for. Not only that, but you’ll drastically increase the machine’s longevity.
This means that you will incur far fewer eye-watering repair bills or – worse – the need to buy a replacement machine years before you ought to have. Instead, you’ll be able to enjoy a sparkling, fully operational machine producing consistently beautiful coffee time and again.