A clean and well-maintained manual coffee grinder ensures your coffee is consistently fresh and delicious. However, many coffee lovers overlook the importance of regular cleaning and maintenance of our manual coffee grinders.
Previously we shared a guide about cleaning an electric burr grinder. In this post, we will take you through the step-by-step process of manual coffee grinder cleaning, including the tools and preparation needed, and the general methods for cleaning most manual coffee grinders on the market.
Understanding Manual Coffee Grinder Parts
Most manual burr grinders can be taken apart for deep cleaning. However, you should know each component before disassembling it into pieces so that you can reassemble them easier and know which part you should pay extra care to during the cleaning process.
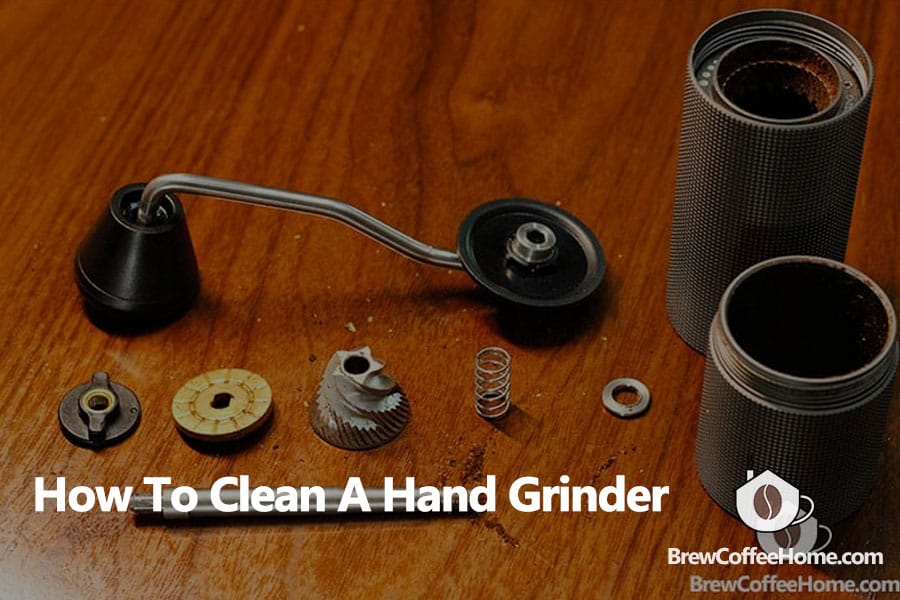
A manual burr coffee grinder typically consists of the following parts:
- Bean hopper: The bean hopper is the container where the coffee beans are placed before they are ground. In manual grinders, the hopper is typically integrated into the main body of the grinder, which is not removable like the one in electric grinders. Remember to remove any leftover beans before cleaning.
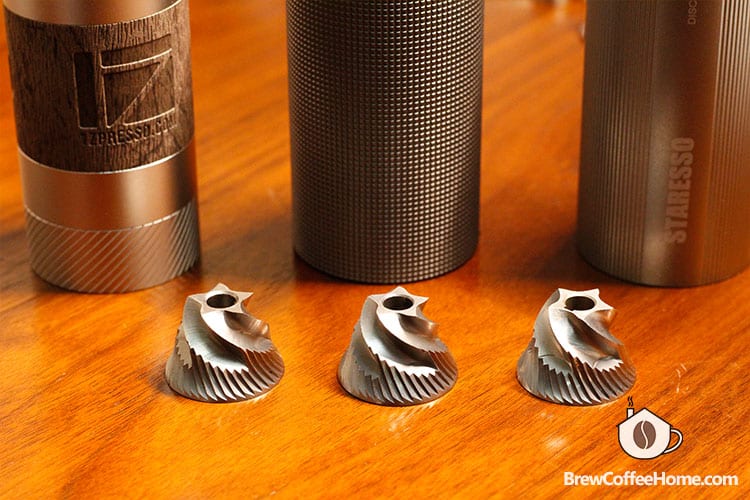
- Burrs: This is the key part of a burr grinder. The inner burr rotates against the outer burr to grind the coffee beans. They are made of ceramic or steel and come in different sizes depending on the model of the grinder. When you clean a coffee grinder, this is the main part you want to clean thoroughly.
- Hand crank: You turn the crank or handle manually to rotate the burrs. It is usually attached to the central shaft of the grinder. The crank can be made of wood, metal, or plastic.
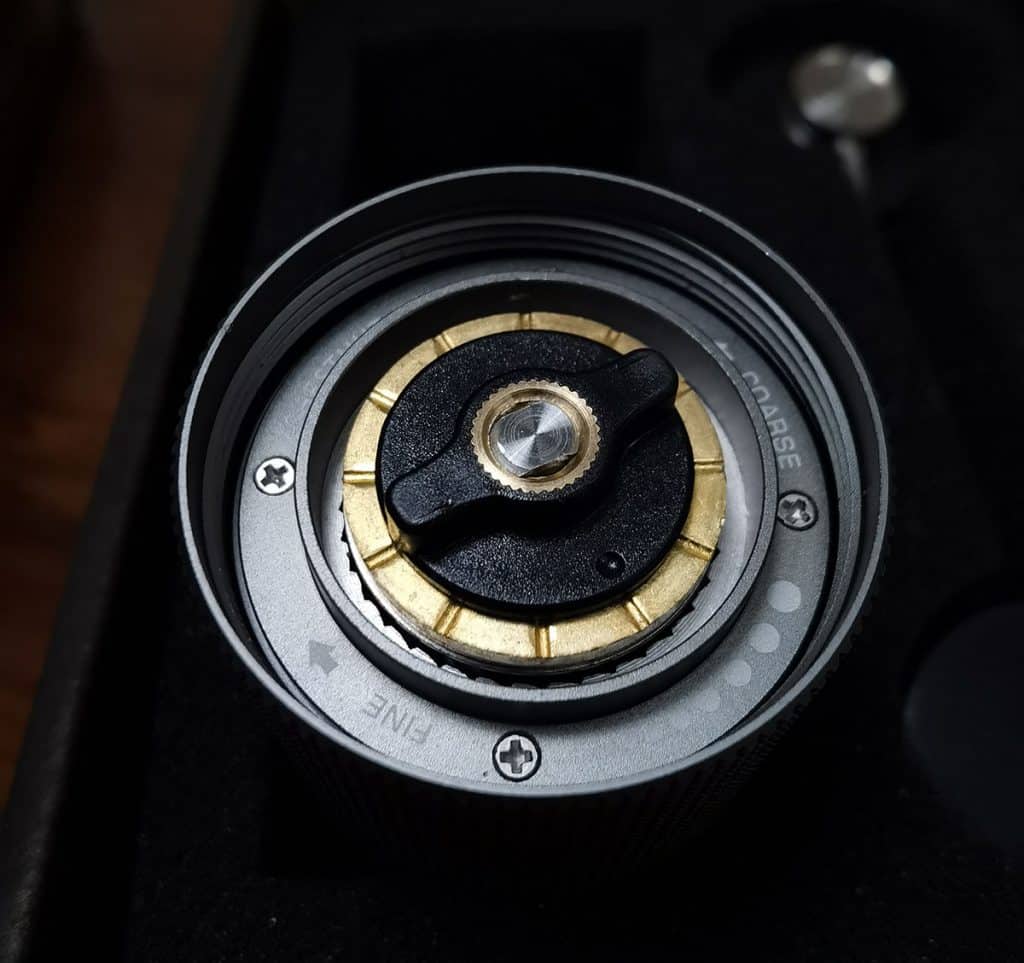
- Grind adjustment knob: This allows you to adjust the coarseness or fineness of the grind. It may be a simple thumbscrew or a more advanced adjustment knob. The adjustment knob is usually located under the burr set, but some manual grinders, like 1Zpresso, use a more user-friendly external grind adjustment.
- Grinds Chamber: This is the container the ground coffee falls into after it is ground. If you don’t clean it regularly, coffee oils and leftover grounds will accumulate over time.
- Central Shaft: A rod or shaft that connects the handle to the burrs and transmits the rotational force from the handle to the burrs. It must be located in the center of the grinder and holds the burrs in place. Wobbling shaft will cause inconsistent grind sizes.
Some manual coffee grinders may have additional parts, such as a lid and some screws, don’t lose any part when you clean your coffee grinder.
How To Clean Manual Coffee Grinders
Step 1: Preparation
Before disassembling and cleaning a manual coffee grinder, it is important to prepare the following items:
- A clean work surface, such as a table. This will help ensure that all the small parts are easy to see and will not be misplaced.
- A small soft brush to help clean the burrs and other small parts.
- A camera, use your smartphone to take photos of each step or take notes of the disassembly process so that you can refer when you miss something.
- Some manual grinders require an Allen key to remove the burr set.
Additionally, it’s always good to have a manual to refer to before disassembling the grinder. This is especially important if you are not familiar with your manual grinder.
When everything is well prepared, you can ensure that the process of cleaning your manual coffee grinder will be as smooth and efficient as possible.
Step 2: Disassembling the hand grinder
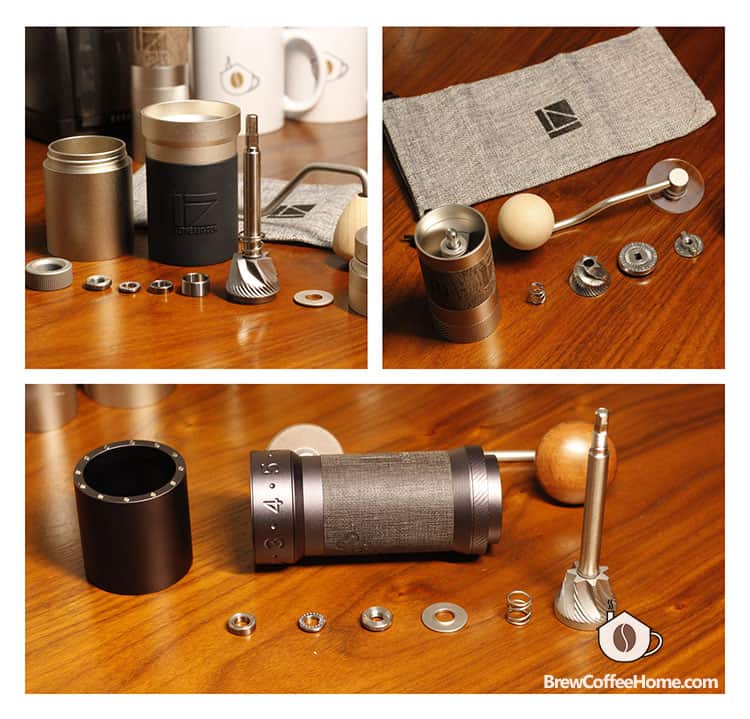
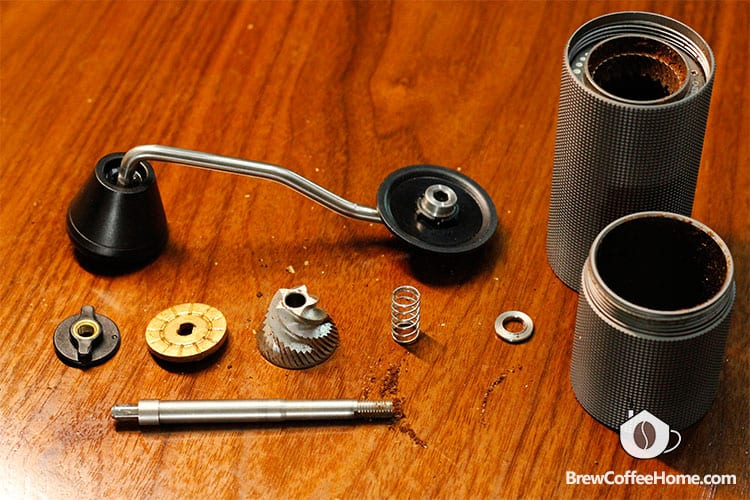
Next, carefully remove each component of the manual burr coffee grinder so that they can be cleaned separately.
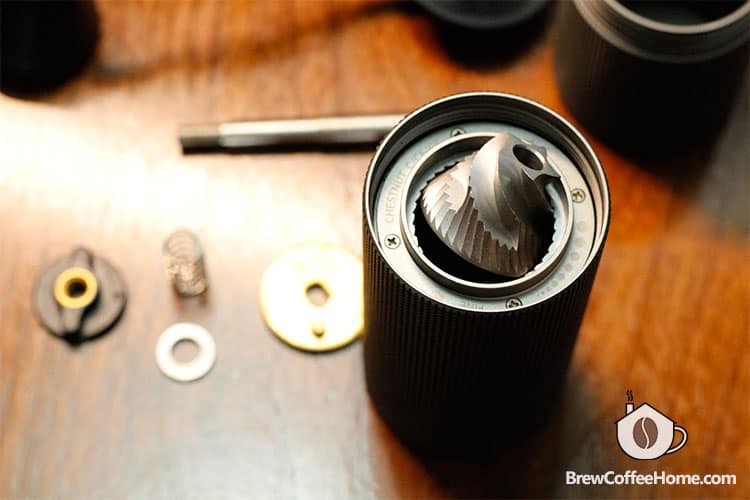
Most manual burr grinders have a grind adjusting knob beneath the burr set. To get access to the burr set, first remove the coffee grounds catch cup, then hold the hand crank to stop the rotation of the shaft, then turn the knob to the coarser side until the inner burr drops off.
Be careful when you remove the burrs and the shaft, some smaller parts, such as the washers and bearings, can easily slip away and disappear. Reassembling your grinder without them is like trying to put together a puzzle with missing pieces. It’s not fun. Make sure you have a good grip on those tiny parts.
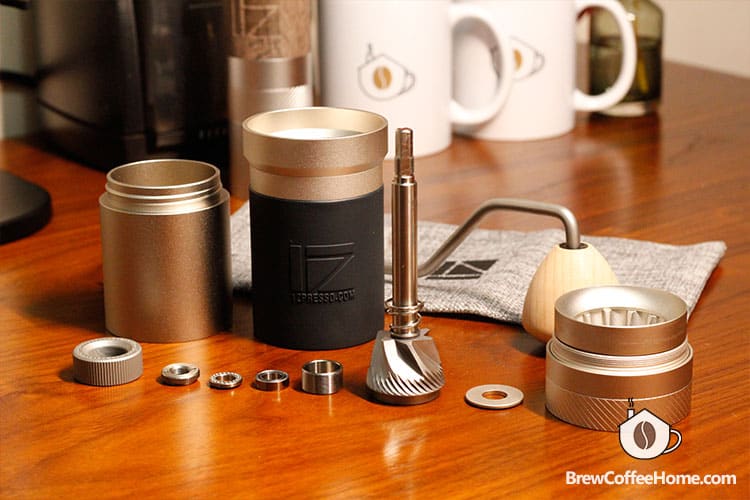
Once you have everything apart, place them well in front of you in order.
Step 3: Cleaning the grinder’s components
It’s best to clean a burr coffee grinder with a brush. Don’t use a vacuum cleaner. You don’t want to miss any tiny piece of your grinder. Brush out any coffee dust and coffee particles on each part.
You can use soapy water to wipe the grind chamber to clear any attached coffee oil.
Focus on cleaning the burrs, which are the core of hand grinders. Remove the old coffee grounds stuck between the blades with a brush. You can also use a paper towel or dry microfiber to wipe out the coffee oils, which will greatly enhance your coffee taste.
There are two types of burrs commonly used in hand grinders: ceramic burrs and steel burrs. Ceramic burrs are less likely to rust or corrode. So you can clean it with soapy water and dry it thoroughly before putting it back.
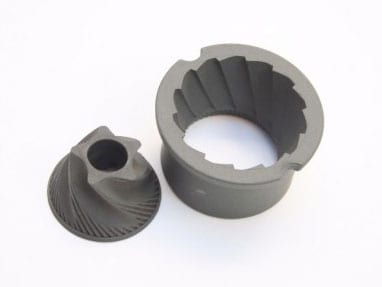
Steel burr is sharper but more porous, don’t drop it on a hard surface. Clean it with a brush and never touch the water.
Step 4: Reassembling the grinder
After cleaning all the parts, you can start reassembling a hand grinder. Usually, you just need to put all the parts back together in the correct order. That’s why we suggest you should lay out all parts in order when you take them apart.
- First, place the washers back into the support and the shaft. Make sure that the washers are facing the correct side. Then, insert the central shaft and ensure it is not wobbling.
- If your grinder has an internal adjustment mechanism, attach the hand crank to the shaft and flip the grinder upside down.
- Next, insert the spring and bearing into the shaft, then put the inner burr in. Make sure that all parts are properly aligned.
- The final step is to push the bottom of the burr against the spring, then attach the knob and turn it to the finer side until it is securely fastened.
Reassembling a hand grinder can be a bit tricky, and it may require some patience and attention to detail. It’s also important to refer to the manual that came with the grinder. Not all hand grinders have the same construction.
Step 5: Calibrating the hand grinder
If you adjust the grind size by counting clicks, you can adjust the grind size and start grinding coffee once all parts are reassembled. Hand grinders such as JavaPresse, Timemore Chestnut C2, or Comandante C40 use this adjustment mechanism.
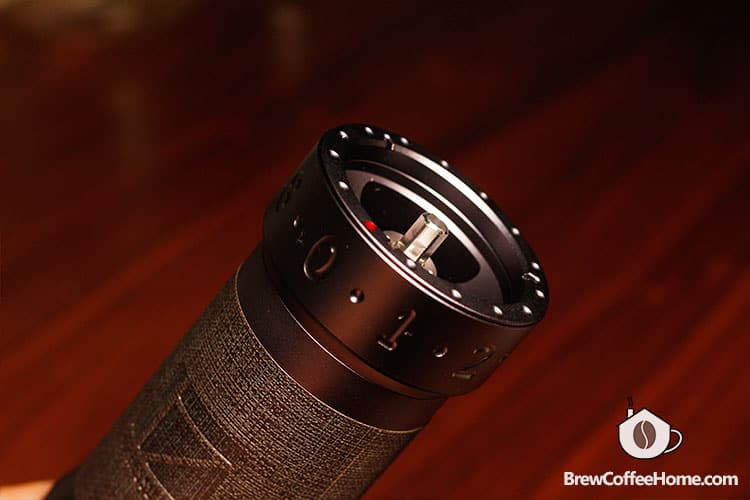
If your hand grinder has number marks, you’ll need to calibrate the hand grinder to the zero point so that you can replicate your grind size easier. For example, the newer 1Zpresso grinders feature an external adjustment ring with numbers. To get the most out of it, you want to calibrate it to find the zero point.
Calibrating the grinder to the zero point is a process that requires patience. You’ll need to adjust the dial back and forth to find the correct position.
How Often Should You Clean Manual Coffee Grinder?
Manual coffee grinders should be cleaned regularly to ensure that the coffee grounds are fresh and free of any built-up oils or debris.
A general guideline for cleaning a manual coffee grinder is to do it at least once a month. If you use it to grind coffee every day, you should clean your hand grinder once every one or two weeks. This keeps everything running smoothly.
If you change to new coffee beans, cleaning the hand grinder ensures the clarity of your freshly ground coffee.
Additionally, if you notice that the grind size is inconsistent or the coffee is not tasting as good as it should, it’s time to clean your grinder.
Final Thought
Clean coffee grinders guarantee the best coffee quality. Regular cleaning, at least once a month, helps keep your hand grinder in good working condition and ensures the freshest coffee taste.
Disassembling, cleaning, and reassembling a hand grinder can be a bit daunting, but it’s not that difficult when you’ve done it once.