If you don’t have an espresso machine with a milk frother, you might assume the chance to make milk-based coffee drinks like flat white, cappuccino or cafe latte is out of reach.
However, it doesn’t need to be the case. One solution is the Subminimal NanoFoamer, which lets you create froth and texture your milk to offer gorgeous milky espresso-based drinks.
But is it up to the task? We purchased one to see if it lives up to the hype.
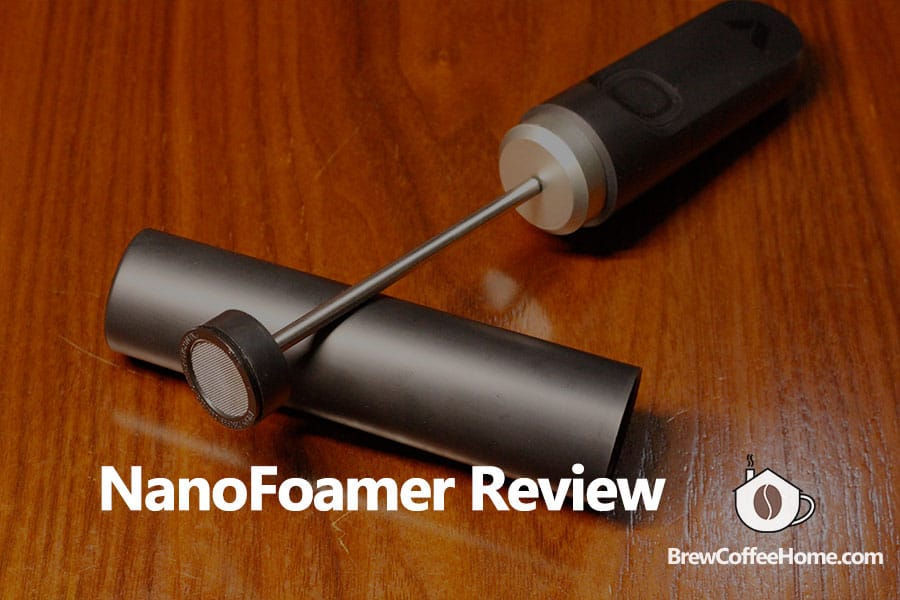
Subminimal NanoFoamer Review
Who Invented The NanoFoamer?
Recent years have seen several successful Kickstarter campaigns to launch new coffee equipment. However, the Subminimal NanoFoamer is one device that stands out in a crowded field.
Subminimal is a Singapore-based company whose founder Dominic Symons invented the NanoFoamer. The campaign was so successful it achieved its funding goals within a day in 2020. Now, the device is available in many countries around the world. Even more encouraging is that it comes with the recommendation of many coffee experts.
On the surface, it’s easy to see why. After all, the chance to create microfoam for latte art without spending big money on an espresso machine is attractive.
Design And Build Quality
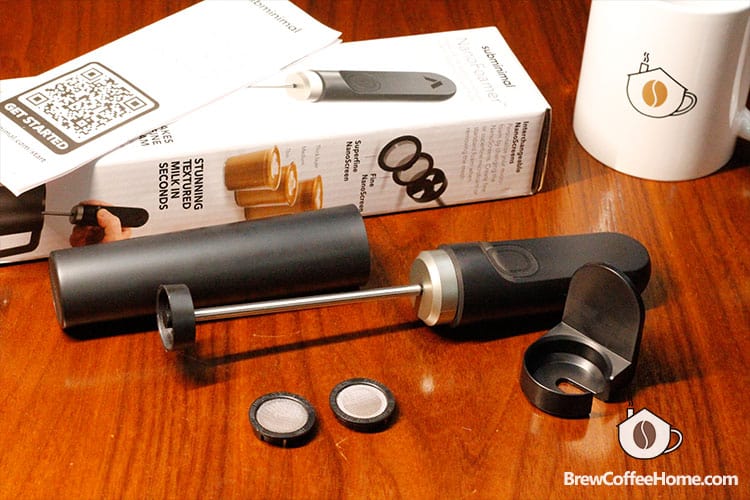
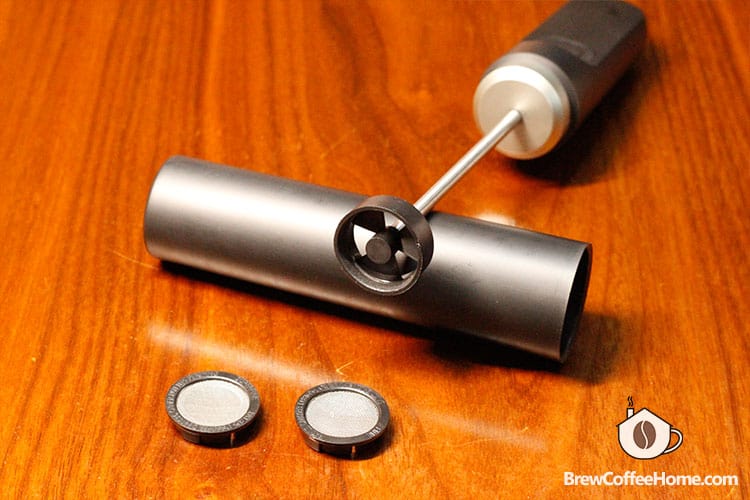
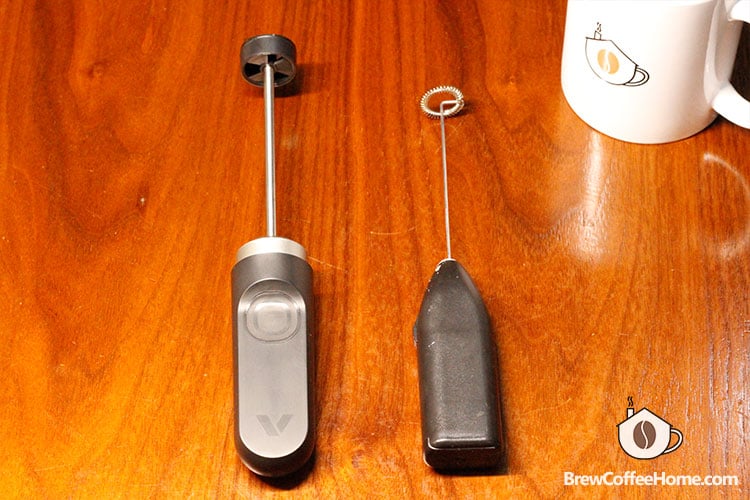
The Subminimal NanoFoamer has a protective hood that covers the frother’s main parts. Once you remove it, it reveals the spinning impeller and stainless steel drive shaft.
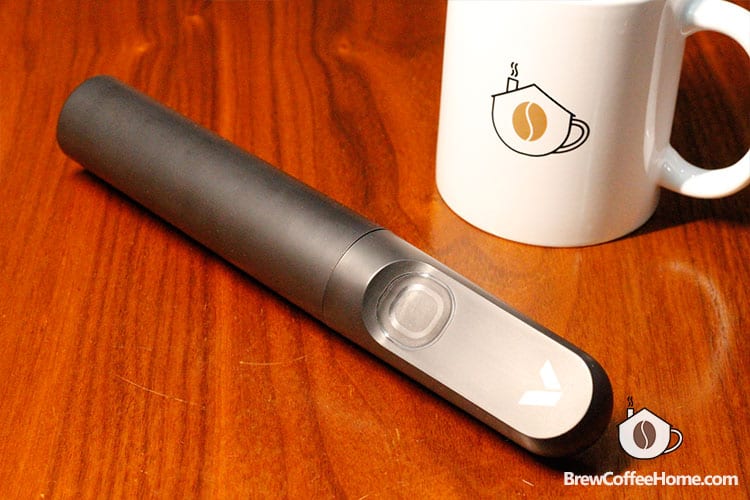
One thing you’ll notice is how small it is. However, it’s also solid to hold because the handle houses a high torque electric motor and the batteries. Meanwhile, the robust stainless steel shaft ensures controlled and sturdy rotation. Subminimal claims that the impeller will operate wobble-free even at 10,000 RPM. Our testing backs up those claims, with the heavy-duty shaft doing a great job.
The Nanofoamer comes with two clip-on Nano Screens, one fine, and the other super-fine. These allow you to create milk with slightly different textured milk for barista-style milk-based drinks, including cappuccino and latte.
The NanoFoamer runs on two AA batteries. Of course, high-quality batteries offer the best frothing performance. Therefore, rechargeable batteries are recommended if you use the NanoFoamer every day. There is a super soft button on the handle that you press to operate the frother.

The package contains an adhesive wall mount stand, so you can easily store the frother on a wall between uses. Alternatively, it’s small enough to store in a kitchen drawer if you prefer.
The NanoFoamer is also lightweight and portable. The protective case makes it a fantastic piece of equipment to take with you on your travels.
Meanwhile, FDA and CE-compliant food-grade materials make up the build with multiple patents, so there’s no concern over harmful materials reaching your drink.
NanoFoamer vs Standard Milk Frothers
As we’ve established, the NanoFoamer has a nice design and sturdy build. This makes it stand out from cheaper milk frothers. However, to really win our approval, its performance is crucial. So, can it create coffee shop-quality microfoamed milk, and does it outperform cheaper alternatives?
We put it up against the less expensive IKEA milk frother, which has a simple whisk at its base to create normal foam.
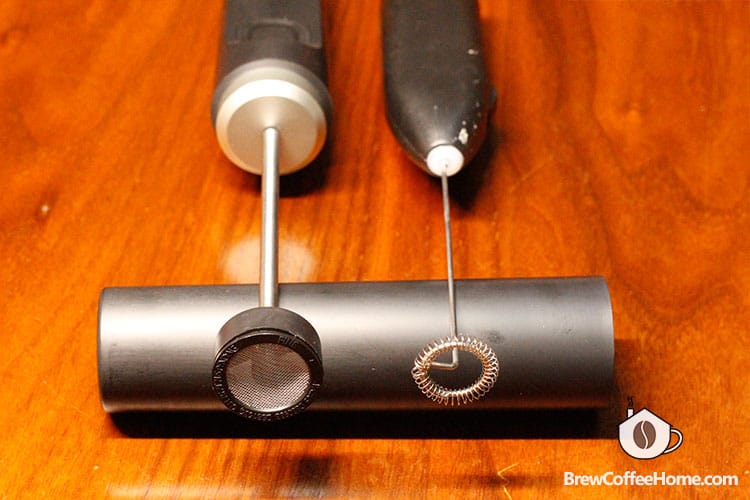
Using the regular milk frother, you can either have runny milk or stiff frothy milk with big bubbles. However, creating silky-smooth microfoam capable of latte art is virtually impossible with this type of milk frother. When mixing drinks using ordinary foam, the flavors stay separated, while there’s no scope for producing latte art with rigid froth.
On the other hand, the NanoFoamer sets out to create the perfect microfoam you’d expect from the steam wand from a coffee machine. Let’s see if it succeeds.
Milk Frothing Performance
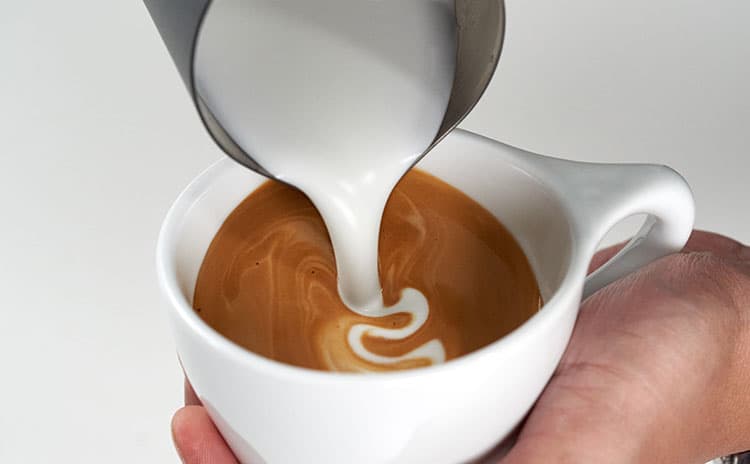
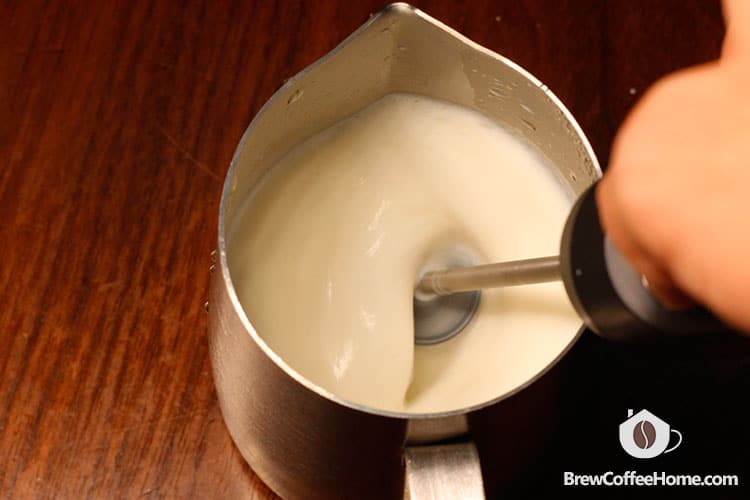
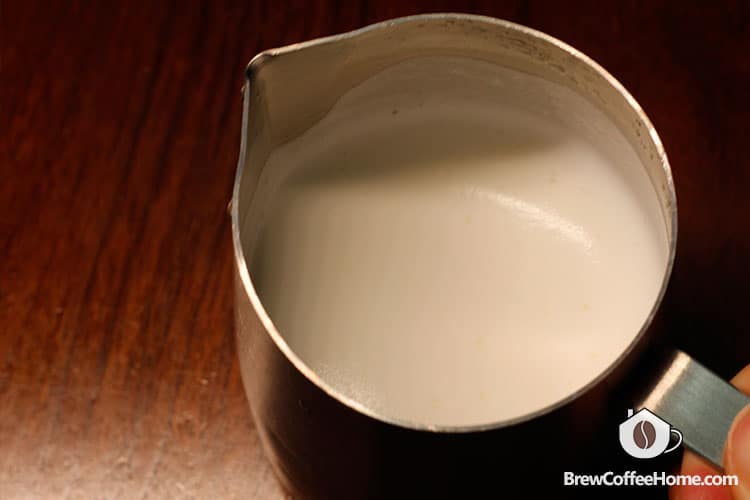
Beautiful latte art requires liquid velvet texture, resembling pouring paint rather than dry foam.
The NanoFoamer is intended to perform like a steam wand on a home espresso machine. To texture the milk using a steam wand, you first aerate or stretch the warm milk to create foam. Next, you need to break down the foam into microfoam and integrate that texture throughout the milk. Eventually, you’ll have smooth milk with the appearance of wet paint.
As we mentioned earlier, the NanoFoamer has a specially designed impeller and NanoScreens. It uses almost identical steps to create super-fine microfoam combined with rapid speed. Even better, the NanoScreens each have a different fineness, so you can create the precise type of microfoam you need. For example, cappuccino needs thicker milk foam, while flat white needs extremely fine microfoam.
Our testing found that the Nanofoamer creates better milk froth that blends perfectly with espresso than regular milk frothers. Full disclosure: at present, creating beautiful latte art isn’t our forte. However, we would be happy to drink the cappuccino we created at any specialty coffee shop for flavor and texture alone.
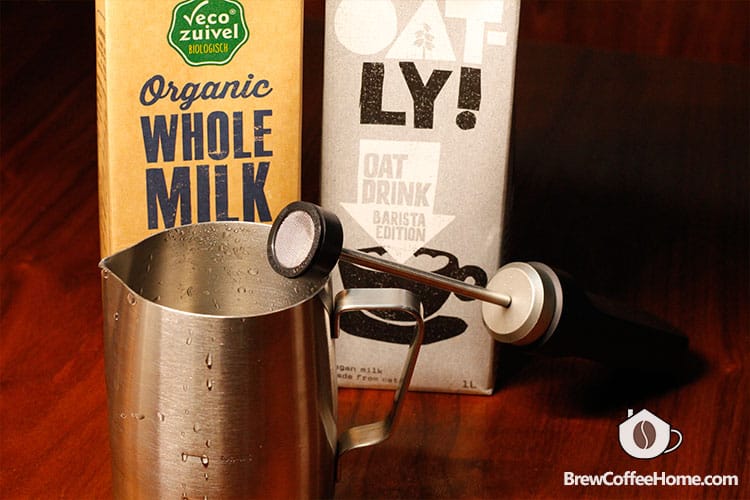
The NanoFoamer is effective enough with skim milk, but it is surprisingly good with soy milk, almond or oat milk alternatives. In addition, the NanoFoamer creates gorgeous milk foam in only 30 seconds, which is extremely impressive. We picked NanoFoamer as the best handheld milk frother due to its great performance.
Ease Of Use
The company offers excellent customer service. For example, we received an email with a link to the quick start guide and latte art class once shipping began, making it as straightforward as possible to get going.
However, texturing milk consistently is a tricky feat that requires practice. Thankfully, access to Subminimal’s Latte Art Master Class comes with the purchase. This offers plenty of tricks and advice on improving your pouring and frothing techniques.
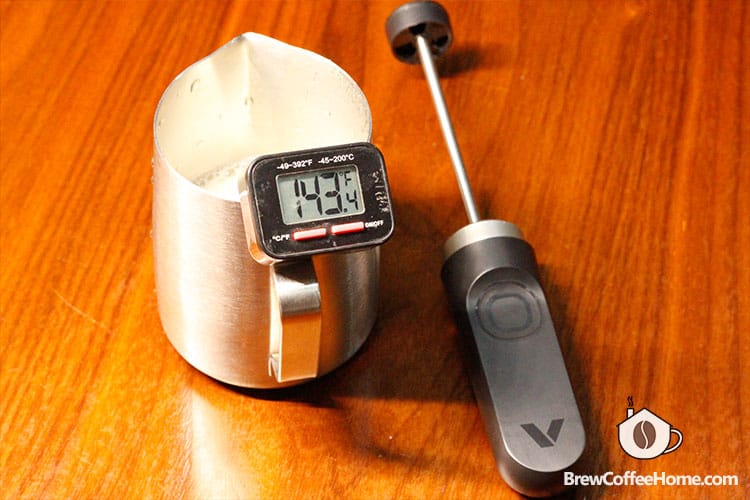
One small drawback is that the NanoFoamer differs from an espresso machine’s steam wand because it doesn’t heat the milk. Therefore, you’ll need to heat the milk in a microwave or on a stove to around 55C-65C (130F-150F) for the best texture and sweetness.
How To Use The NanoFoamer
Let’s examine how to use the NanoFoamer. Remember that you’ll need to adjust aeration time depending on the coffee drink you’re making or the milk you’re using.
- Heat your milk to the optimal milk temperature, then pour it into a milk jug.
- Select your NanoScreen. For newbies, the fine NanoScreen is the best option.
- Place the impeller just below the milk’s surface at a slight angle and in the middle of the jug. Hold down the power button to start.
- Aerate the milk and incorporate air in 5 to 10 seconds. There will be a gushing sound when the air bubbles are created. The longer you spend on this step, the thicker the foam.
- Slowly move the impeller deeper and a few millimeters towards the side of the jug. The gushing sound will stop. Keep the impeller deep into the milk and maintain a strong vortex. Any surface bubbles will be pushed down and smashed by the NanoScreen.
- With a steady hand, churn the milk for a further 25 seconds. Make sure you don’t move the position of the impeller or lose the vortex. If you do, more bubbles will appear.
- Release the power button and remove the impeller. Your microfoam will be ready.
Tip: if you want to make cold froth for cold brew, froth the cold milk without heating it beforehand. This creates thicker froth than using warm milk. It’s great for making Starbucks cold foam cold brew coffee at home.
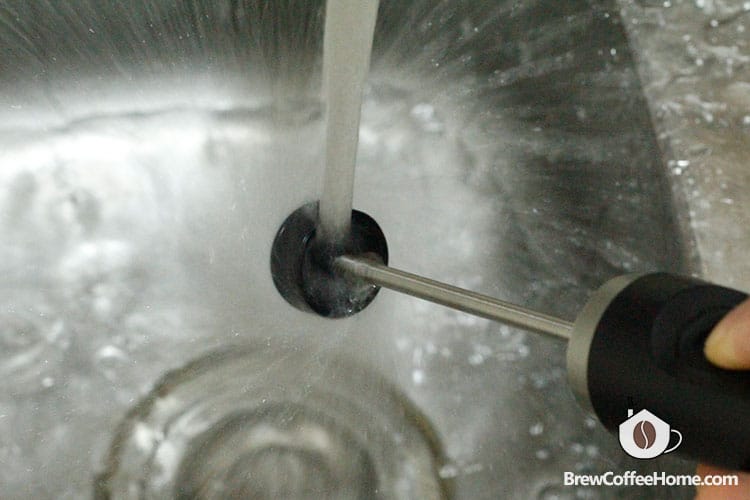
Ease Of Cleaning
Cleaning the NanoFoamer is quick and easy because it’s waterproof. Rinsing it under the tap will prevent excess milk from building up on the shaft or impeller. Rinse it in soapy water for a deeper clean, then rinse under the tap and dry it.
Value For Money
The NanoFoamer costs more than a basic handheld milk frother but less than a cheap automatic milk frother. However, it produces such high-quality foam that it offers excellent value for money.
Also, it represents a far cheaper alternative to an expensive espresso machine, meaning you can brew espresso-like milk-based beverages using an AeroPress or Moka pot. It’s also worth considering for people who use manual lever espresso machines but don’t have a steam wand.
NanoFoamer Accessories
There are several accessories to buy separately. Let’s look at two of them.
Milk Pitcher
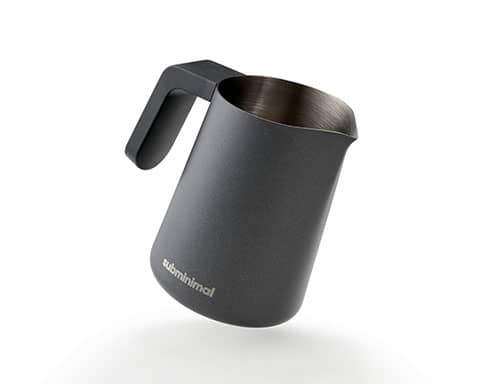
If you don’t have a milk jug for pouring latte art, you can consider the FlowTip milk pitcher. It has a heat-resistant handle so you can heat the milk in the pitcher on your stovetop. The accessory is also beginner friendly as there are marks on the side to avoid overfilling, meaning you shouldn’t have insufficient milk or foam.
Contactless Thermometer
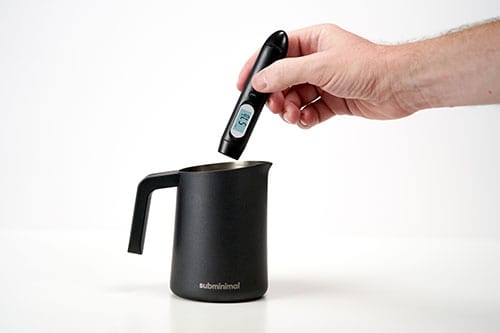
The milk temperature is crucial for the best foam. You should aim for 55C-65C (130F-150F). That’s because once the temperature reaches around 70C (158F), the proteins begin breaking down, and the milk loses its sweetness. This handy thermometer offers better control. It also switches between Fahrenheit and Celsius, while it is good for other kitchen uses.
Our Verdict – The Best Handheld Milk Frother On the Market
The NanoFoamer is portable enough to take on your travels and relatively inexpensive while offering far better milk foam than regular milk frothers or using a French press to froth milk.
Frankly, there’s not much to dislike about this simple and budget-friendly milk foamer. You can easily make your own barista-style cappuccino or other milk-based coffee drinks. Yes, there is a learning curve, so it’s unlikely you’ll create stunning latte art with it immediately. However, it’s possible with practice.
In short, it’s the best milk frother we’ve ever used.